![]()
![]()
![]()
![]()
|
|
Creating Textures for a ballThe following applies to most of my striped beach ball products, though the inside mesh section is most applicable to "Super Bouncy Fun Ball" or "Land Super Fun Ball"
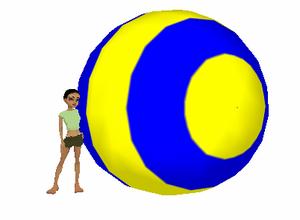
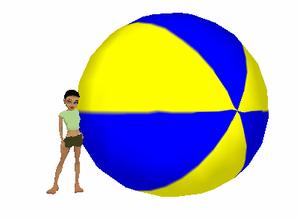
This is obviously not the traditional beach ball pattern.
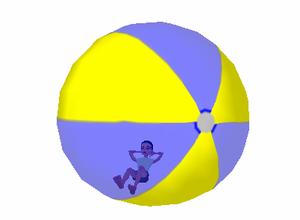
This is more like a traditional beachball, however a ball typically has a circle at each pole so all six panels of the ball do not all come together to a point.
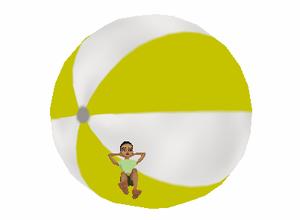
Adding opacity to the ballTo add opacity we require an opacity map. An opacity map is a monochrome texture that describes how solid the object's colour will be. White indicates solid, black indicates total transparency and (if blending is selected) greys can be used to indicate varying degrees of transparency.
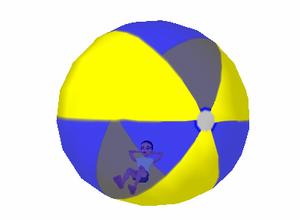
Using an inside meshThe following is more complicated and may require messing around with the mesh tab to get things how they need to be. Super Bouncy Fun Ball is configured for this by default, though if you deleted the inside mesh then you might want to re-derive.First I'll demonstrate what an inside mesh might be used for:
Then it might look like this:
What we need is a mesh for the ball viewed from the inside, then we could have text on the outside and the plain version inside.
Super Bouncy Fun Ball has an inside mesh. If it is to be used then the inside mesh must be listed FIRST, i.e. it must have a lower mesh index. Both sections should have two-sided deselected to prevent conflict. In "Create mode" with my design the outside is always material 0 and the inside is material 1. As published both materials share the same opacity map. If you want to make the opacity maps different then delete the old map before adding the new one. This ensures that it gets a new filename and does not overwrite the existing one. Here's a more extreme example, on the inside the panels are blue, giving it a much stronger effect. The outside panels are still white so the avatar inside the ball doesn't get blue-tinted. You can even make the back solid.
|
 Here is an
example of a simple stripe texture:
Here is an
example of a simple stripe texture:
 Here is the
above rotated by 90 degrees:
Here is the
above rotated by 90 degrees:
 I've added grey
"poles", these will transform into circles on the ball once the
texture is applied
I've added grey
"poles", these will transform into circles on the ball once the
texture is applied
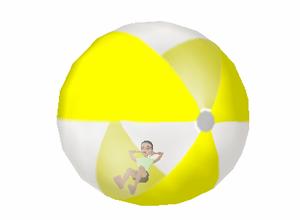
 Here is a
possible opacity map, this will make the yellow faces solid and the blue
faces see-through. For this example I will remove any interior mesh and
concentrate on the outside. If you are trying to replicate this section
with Super Bouncy Fun Ball then you should find mesh tab "0
bteballinside" and select "Remove Mesh"
Here is a
possible opacity map, this will make the yellow faces solid and the blue
faces see-through. For this example I will remove any interior mesh and
concentrate on the outside. If you are trying to replicate this section
with Super Bouncy Fun Ball then you should find mesh tab "0
bteballinside" and select "Remove Mesh"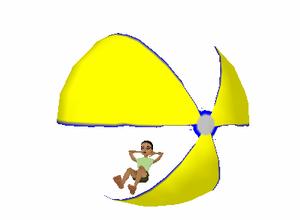

 A further
enhancement is to give the see-through sections a slight texture. This
gives the see-through panels a slightly "smoky" appearance that
can be more pleasing than a constant opacity. I'll also replace the blue
panels with white as light colours are often preferable for blended
sections.
A further
enhancement is to give the see-through sections a slight texture. This
gives the see-through panels a slightly "smoky" appearance that
can be more pleasing than a constant opacity. I'll also replace the blue
panels with white as light colours are often preferable for blended
sections.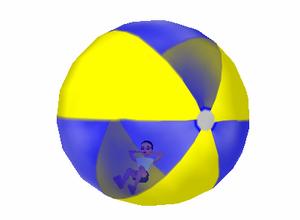
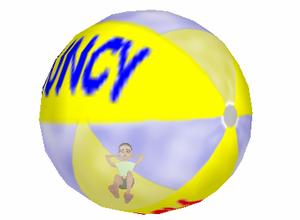
 Lets say I was
to add some text to the outside of the ball:
Lets say I was
to add some text to the outside of the ball: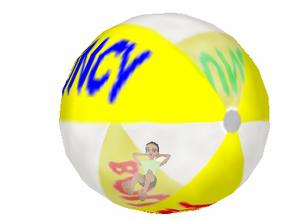 Note that
the writing appears on the inside and viewed from the inside it is
mirrored. If the ball was printed then we would expect to see writing on
the outside only.
Note that
the writing appears on the inside and viewed from the inside it is
mirrored. If the ball was printed then we would expect to see writing on
the outside only.